

How To Make Background Take Full Width Of Page Bootstrap
Create a sleek custom page with Bootstrap
In this tutorial, Bootstrap (opens in new tab) creator Mark Otto volition walk you through the nuts of Bootstrap: what's included, how to use information technology in any project, and how to best customise a typical Bootstrap template.
"Using Bootstrap doesn't take to stop with its default components and styles," he says. "With a trivial HTML and CSS, nosotros can do only about anything. Then, let's dive in!
Getting started
While all CSS (opens in new tab) in Bootstrap is written in LESS, we will only be using the fully compiled CSS (and a sprinkling of JavaScript (opens in new tab)). To best showcase how to apply Bootstrap we'll be creating a brand new example template to be included in a future release of the projection.
Nosotros've got everything you lot'll need for this projection wrapped upwardly in a separate zip, which you lot tin can download hither (opens in new tab). Upon opening, y'all'll find Bootstrap's compiled CSS, compiled JavaScript, and our new template in various stages.

We need to put together the most basic version of our page template: HTML scaffolding to render the folio and link to the Bootstrap assets.
<!DOCTYPE html>
<html>
<head>
<link href="css/bootstrap.min.css" rel="stylesheet">
</head>
<body>
<h1>Hello, earth!</h1>
<script src="http://lawmaking.jquery.com/jquery-latest.js"></script>
<script src="js/bootstrap.min.js"></script>
</body>
</html>
This is the most basic class of a Bootstrapped web page: simple HTML with just the CSS included. That tin work fine in some cases, simply what we really want is a page filled with a few Bootstrap components, some custom content and a few pattern tweaks to top it off.
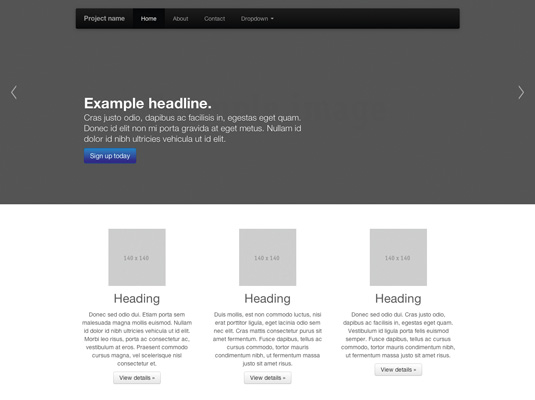
It's time to add some Bootstrap components. Nosotros'll swap our 'hello world' message for a nav bar and carousel, and we'll utilise the grid system to write a three-column section for our marketing copy.
<div class="container nav bar-wrapper">
<div form="nav bar">...</div>
</div>
<div class="carousel">...</div>
<div course="container marketing">
<div class="row">
<div course="span4">...</div>
<div course="span4">...</div>
<div class="span4">...</div>
</div>
</div>
Practise note that we're also simplifying the HTML in this post, merely the consummate code is in the downloads.
Creating columns in Bootstrap is like shooting fish in a barrel with the congenital-in 12-column grid organization. To use information technology, create a .row to firm the columns. For each column of content, specify how many grid units the column should bridge.
In this instance, nosotros want three columns spanning four filigree units, so we accept iii instances of .span4. The filigree arrangement enables you lot to make any layout to house just nearly any content – just create the columns and add together in your content.
Below the columns we'll add our own new component, .featurette (using some of the coding all-time practices found in Bootstrap), to firm some larger marketing messaging and visuals.
<div class="featurette">
<img class="featurette-image" src="...">
<h2 class="featurette-heading">...</h2>
<p grade="lead">...</p>
</div>
<60 minutes class="featurette-divider">
<div grade="featurette">
<img class="featurette-epitome" src="...">
<h2 class="featurette-heading">...</h2>
<p class="lead">...</p>
</div>
Yous'll see nosotros take a base of operations course, .featurette, for the core component. Inside that, nosotros'll use prefixed classes such equally .featurette-image and .featurette-heading, to easily target elements within our component. Prefixed classes ensure shorter CSS selectors, fewer lines of code, and smarter categorical naming schemes. With these basics in identify for our new component, it's time to motion on.
Customise with CSS
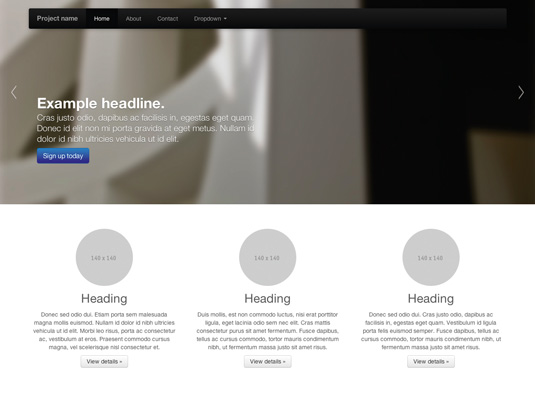
OK, so we've Bootstrapped our new HTML page, utilising some of the ready-made components and grid system, equally well every bit writing our own component. Adjacent let's customise the default carousel and nav bar a bit. Nosotros'll stretch out the carousel and style each slide, then increment the height of the nav bar and layer it on superlative of the carousel.
There are two bones ways to customise Bootstrap components: modifying HTML and adding boosted CSS. The best implementations exercise both, and this tutorial is no different. If you remember from our HTML, we wrapped the nav bar in its own container (for centring on the folio) while the carousel sits on its own.
This is of import because it enables us to easily position them while enabling more customisation of the carousel slides. Finagle the nav bar into position by targeting its container, .nav bar-wrapper with a chip of CSS:
.nav bar-wrapper {
position: relative;
z-index: 10;
margin-pinnacle: 20px;
margin-bottom: −90px;
}
We utilise position and z-index to render the nav bar on a college plane than the carousel, and a negative 'margin-lesser' to pull upwardly the carousel. We'll too increment the padding on the nav bar links to arrive a bit taller.
.nav bar .brand,
.nav bar .nav > li > a {
padding: 15px 20px;
}
Now, we have to align the text in each carousel slide with the rest of the folio. By default, the carousel includes simply an <img> for the groundwork of each slide and a <div> to house the explanation.
<div form="carousel slide">
<div class="carousel-inner">
<div course="item">
<img src="..."> <div form="carousel-explanation">...</div>
</div>
</div>
</div>
The carousel will stretch to fill its parent as nosotros set width: 100%; in the Bootstrap core. To marshal the custom content within each slide to the residual of the page, add a <div class="container"> around the caption. Once done, the slide markup should await like this:
<div class="item">
<img src="...">
<div course="container">
<div class="carousel-caption">...</div>
</div>
</div>
To brand the carousel wait like our final example, we'll alter the next and previous controls and customise the captions. The CSS is lightweight, involving some calorie-free overrides and modifications.
text-shadow: 0 1px 1px rgba(0,0,0,.iv); /* Higher dissimilarity */ background-colour: transparent;
edge: 0;
}
.carousel-caption { position: static;
max-width: 50%;
padding: 0;
margin-bottom: 100px;
groundwork-color: transparent;
}
With a few tweaks to the text within the caption, we accept our finished carousel. Lightweight HTML changes and around 20 lines of CSS give us a custom look, while maintaining all the awesomeness of Bootstrap'south default component.
Now it'due south time to write our ain component, the featurette. We already have almost all the HTML written, and then permit'due south just get some basic styles in place. Our inspiration for this component is marketing content similar that of Apple (opens in new tab): large headings, lightweight text and some large visuals.
.featurette-divider {
margin: 80px 0; /* <hour> between each */
}
.featurette {
padding-top: 120px;
overflow: hidden; /* Clear floats */
}
.featurette-prototype {
margin-height: −120px; /* Vertically centre image with the text */
}
.featurette-heading {
font-size: 50px;
font-weight: 300;
line-height: 1;
letter-spacing: -1px;
}
.featurette-image.pull-left {
margin-correct: 40px;
}
.featurette-paradigm.pull-correct {
margin-left: 40px;
}
And that'southward it actually. Given Bootstrap's default styles, the amount of custom CSS we have to write for a new component is quite low. Bootstrap'due south default typography styles such every bit .lead provide united states of america with swell looking marketing text while utility classes similar .pull-correct enable super fast floats. Without these, nosotros'd accept to rewrite common CSS for each custom component.
Mark Otto (opens in new tab) is creator of Bootstrap and designer specialising in HTML, CSS and pattern systems.
Besides read:
- Bright WordPress tutorials (opens in new tab) for designers
- Our favourite web fonts (opens in new tab)
- How to use content sliders in web design (opens in new tab)

Thank you for reading 5 articles this calendar month* Bring together now for unlimited access
Enjoy your first month for merely £1 / $ane / €one
*Read v gratuitous articles per month without a subscription
Join now for unlimited admission
Endeavour first month for just £1 / $ane / €1
Related articles

How To Make Background Take Full Width Of Page Bootstrap,
Source: https://www.creativebloq.com/web-design/create-sleek-custom-page-bootstrap-9134283
Posted by: hughesbegadd.blogspot.com
0 Response to "How To Make Background Take Full Width Of Page Bootstrap"
Post a Comment